
Every stage depends entirely on the success of the previous one. A mistake made during sanding becomes obvious after staining. An improperly applied stain cannot be hidden by the finish. Even the final protective coats require careful application techniques that take years of experience to master.
Professional hardwood floor refinishing is often described as equal parts craftsmanship, patience, and technical knowledge.
Step One: Sanding Creates the Foundation
Every successful refinishing project begins with sanding. Professional contractors often refer to the first sanding pass as roughing. This initial cut uses the coarsest abrasive needed to completely remove the existing finish while beginning to flatten the floor.
However, roughing is only the beginning.
The floor is then sanded multiple additional times using progressively finer grits. Each sanding removes the scratches left by the previous grit while creating a smoother and more uniform surface. Think of it as preparing a blank canvas before an artist begins painting.
The goal is not simply removing the old finish—it is creating an even surface that will accept stain consistently across every board.
If sanding is rushed or performed incorrectly, those imperfections remain hidden until stain is applied, when every sanding mistake suddenly becomes visible.
Step Two: Staining Is Where Experience Matters
Many homeowners believe stain simply changes the color of the wood. In reality, stain reveals the quality of the sanding beneath it.
Different wood species absorb stain differently. Red oak, white oak, maple, hickory, walnut, and fir each respond in their own unique way. A flooring contractor must understand how each species accepts color and adjust preparation techniques accordingly.
If the floor was not sanded evenly, stain will penetrate unevenly, creating dark patches, light areas, swirl marks, chatter marks, or blotchy discoloration. At this point there is no quick repair.
Correcting these problems usually requires sanding the entire floor again and repeating the staining process from the beginning.
Step Three: Applying the Protective Finish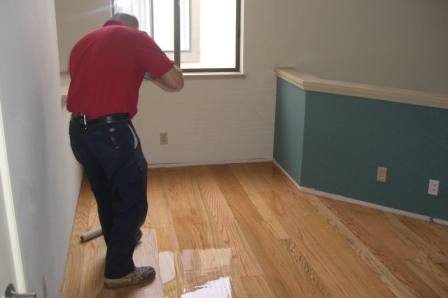
Once the stain has completely dried, the protective finish can be applied.
Most professionally refinished hardwood floors receive a minimum of three coats of finish to provide long-term durability and protection.
Applying finish appears simple, but technique is critical. Maintaining a wet edge, controlling lap marks, working with proper lighting, and understanding drying conditions all contribute to the final appearance.
In some situations, additional buffing between coats is required to ensure proper adhesion and a smooth final surface.
If problems develop during the finishing stage, an experienced contractor may be able to correct them. Without that experience, many DIY projects require sanding and refinishing all over again.
Professional Equipment Makes a Significant Difference
Professional C-15 licensed flooring contractors use specialized sanding equipment designed specifically for hardwood floor refinishing. These machines produce consistent results while allowing experienced operators to maintain flat, even sanding across the entire floor.
The equipment commonly available through rental centers is intended for consumer use and differs significantly from the professional equipment used by full-time flooring contractors. Even with the right equipment, achieving professional results still requires extensive experience.
Professional flooring contractors also have access to commercial-grade stains and finishes that are distributed through flooring supply companies. These products are selected for durability, appearance, and performance.
Time Is Only Part of the Equation
For a room of approximately 300 square feet, an experienced professional can often complete the refinishing process in about three days, depending on the condition of the floor and the finish selected.
A homeowner attempting the same project must first learn how to operate unfamiliar equipment, determine the correct sanding sequence, understand stain application techniques, and properly apply multiple coats of finish. If mistakes occur during any stage, the project timeline increases dramatically.
What begins as a weekend project often becomes a much longer and more frustrating experience.
One Mistake Can Affect the Entire Project
Unlike many home improvement projects, hardwood floor refinishing offers very little margin for error.
- Incorrect sanding becomes visible after staining.
- Uneven stain usually requires sanding the floor again.
- Improper finish application may require buffing or complete refinishing.
- Errors often are not discovered until the entire project has been completed.
Each stage builds upon the previous one, making precision essential from the very beginning.
The Value of Professional Experience
Hardwood floor refinishing is a skilled trade developed through years of hands-on experience. It requires specialized equipment, premium materials, technical knowledge, and an understanding of how every step influences the final appearance.
National Floors has refinished hardwood floors throughout the Bay Area for decades. Our goal is not simply to make a floor look new again, but to deliver results that homeowners can enjoy for many years while protecting one of the most valuable features of their home.
